For complete procedure pls check the Deploy the Oracle Database Appliance (ODA X6-2S,M,L) Small,Medium and Large (Part 1)
In this part 2, we will continue the ODA deployment with web browser.
1. Goto web browser and enter IP-Address and port number and accept security certificate warning to proceed to login.

2. Login with username oda-admin and password.

3. Click on Create appliance to start the deployment.

4. Fill-up the System Information.

5. Fill-up the Network Information.
 6. Select the User and Group and choose OS Role separation.
 7. Fill-up Database Information to create the database during deployment.
 8. Fill-up Information for ASR, to configure the ASR during deployment. then click on Submit.
 9. Will prompt for confirmation after clicking on Submit. click on yes.
 10 New window will popup with Job Status, click on provided link to see the progress.
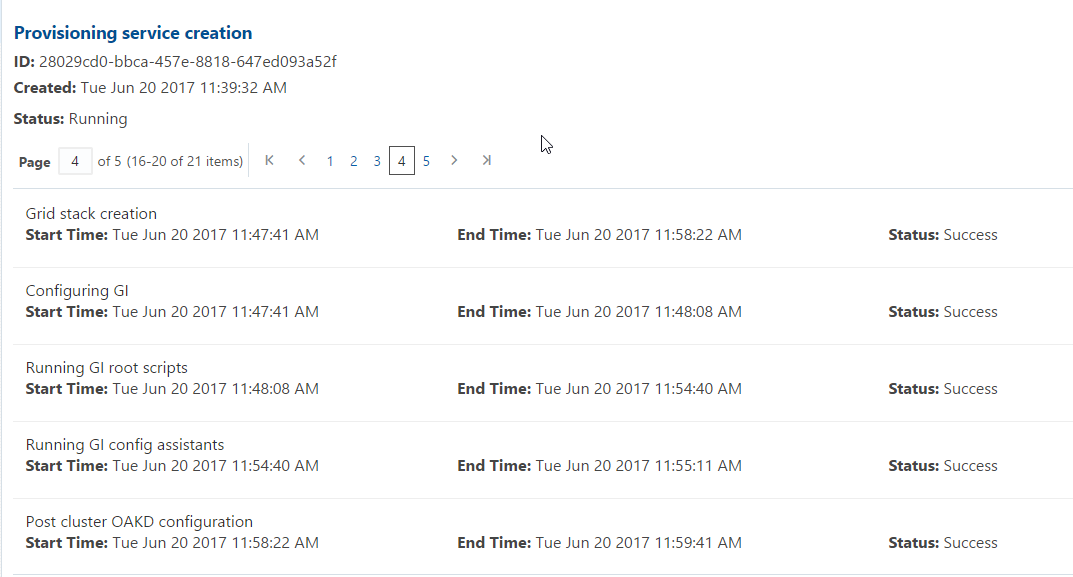
 11. below screen shots will show the progress of the deployment steps.keep monitoring till job is completed successfully.


 13. Click on Network tab, to see the network information.
 14. Click on ASR tab, to see the ASR configuration info or to configure the ASR if not done yet.
 15. Click on Database tab to see the installed database. Click on Specific database to see the detailed information of the database.
There is also create database tab to create new database.
 16. Click on Database homes to see or to create the Database homes.

In this part 2, we will continue the ODA deployment with web browser.
1. Goto web browser and enter IP-Address and port number and accept security certificate warning to proceed to login.

2. Login with username oda-admin and password.

3. Click on Create appliance to start the deployment.

4. Fill-up the System Information.


12. Once deployment is completed, Click on Appliance to see the configuration info.


There is also create database tab to create new database.


No comments:
Post a Comment